The following post explains how to add a new terminal to the network.
Step 1 - Install Java
C9 is based on Java technology. You can download java from our downloads folder here: Downloads. Previously we recommended installing java from Oracles java website. We now strongly discourage this as the version on the Oracle website cannot be freely used for commercial purposes. Instead use the one on our website.
Step 2 - Download/Run Installer
On the new terminal, goto Downloads page and click on "C9 Terminal/Client Installer" and click on Ok/Download to download the program.
Step 3 - Running Installer
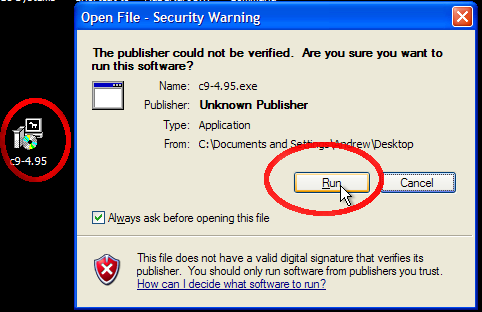
If you saved the program instead of ran it, then click on the saved program to run it. Click on Run to run the program if a security alert appears.
Step 4 - Installer options
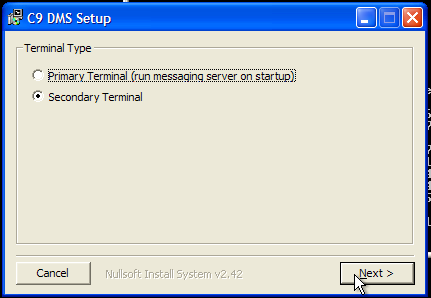
The installer only asks one critical question. Whether it is a 'primary terminal' or a 'secondary terminal'.
Primary terminal installs an additional piece of software called messenger. Messenger is c9's gateway to internet services such as email/sms and other integrations. Generally only one messenger should be installed in the network and it should generally be installed on the most heavily used computer. e.g. the Spare parts main desk. If you are installing a computer to replace the existing main computer then select "primary terminal". Otherwise leave it as secondary terminal.
Step 5 - Complete installation
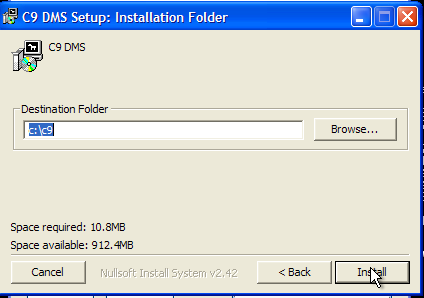
Click on Next >, and then Install to perform installation. Default directory to install is c:\c9
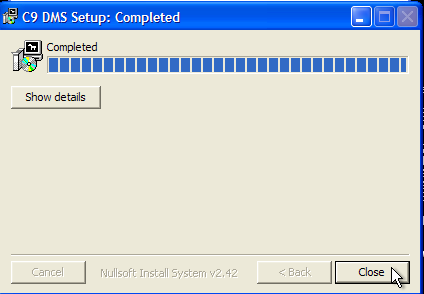
Note that under some circumstances, after install Windows may complain that the install did not succeed. This error message can be safely ignored. The reason for this is that C9 does not install itself as a registered application.
Step 6 - Run C9 for the first time
On desktop there will be an icon for C9. Click on this to run C9.
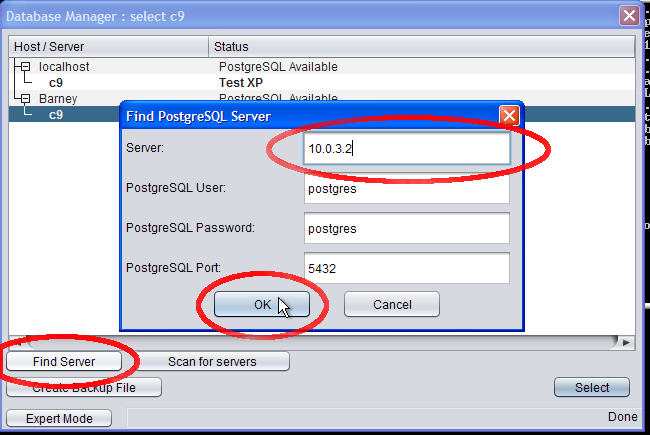
When c9 is first run you will see a window called database manager. This window is where to tell the terminal where the database is installed. Normally the program will search for the database on your network, this will take about 15 to 30 seconds. Highlight the database (called) c9 and click on Select. The system is now ready to be used.
But under some circumstances, depending on how your computer network is setup, this will not successfully detect the location of your server and you have to type it in manually. In such cicumstances you need to manually connect. Click on Find server to type in manual details. You need to fill in 'Server' option. This option is the address of your server. Known as the IP address.
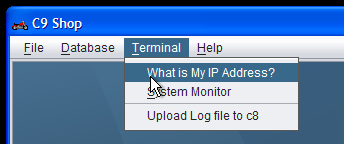
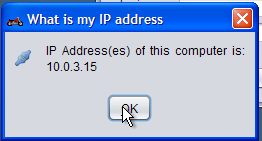
To find the IP address, run a copy of C9 on the same computer that the database server is installed on and click on Terminal, What is my IP address? This number is what needs to be typed into the terminal. If there are multiple numbers then try them one by one until you have one that works.
A common problem is using virtual private network software at the same time. Some manufacturers provide software that allows your computer to securely connect to their network. It does this by temporarily modifying your computer so your computer thinks it is part of their computer network. Such software can sometimes interfere with c9 but generally only on the first time you configure c9. When connecting c9 terminal for the first time and you are having trouble connecting to the server, make sure that you are not connected to any dealer software.
Step 7 - complete configuration
Some application settings are stored on the local computer. Most notably are printer settings. To configure printers, after logging into c9 on the new terminal, click on Setup. The first page will display current printer settings. Make changes are required.
For docket printers, ensure that you setup correct till open and page cutting based on printer model. Also setup line feeds and test. It is recommended for docket printers to install a Generic/Text printer as the Windows printer driver. Some older printer drivers for common docket printer models do not work with Java. Generic/Text printing provides a workaround in such circumstances.
