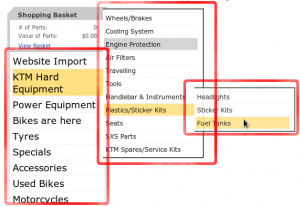
On a c9 published website is a menu which web users can expand and navigate. To illustrate:
The menu demoed above has three levels.
- Main menu - in above example 'KTM Hard Equipment' is selected
- Sub menu - Plastics/Sticker Kits is selected
- Sub sub menu - Fuel Tanks is selected.
These menu settings are configured in c9. To access in c9 goto:
- Business
- Website
- Website Structure
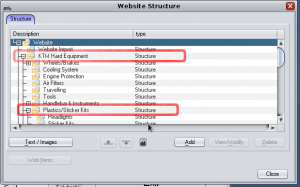
The structure you see is as follows:
In the above, the KTM Hard Equipment and Plastics/Sticker Kits are highlighted. To see Fuel Tanks, you need to scroll the list down a little bit.
Adding a new menu item
To add a menu item, you need to select a menu that is the 'parent' of the menu you want to add. If you want to add an item on the main menu select 'Website' at the time. To add something under Plastics/Sticker kits. Select that option.
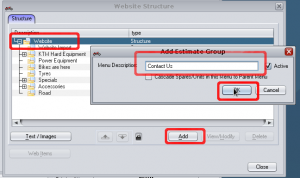
Once selected, press the 'Add' button and type in the name of the new menu item.
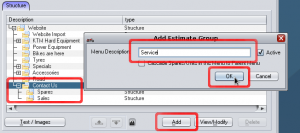
Example 1 - under main menu we want to add a 'Contact Us' item. Select website, press add and type in contact us. Press OK.
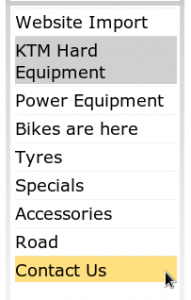
Now within 5 seconds or so the website will automatically update. i.e. on the website:
Example 2 - under newly created 'contact us' we want to create sub menus for workshop, spares and sales. This can be done by selecting contact us and adding items. e.g.:
And the result on the website:
Modifying Order of items
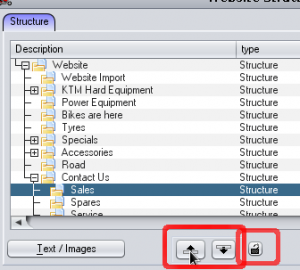
You can modify order of things by clicking on the padlock and then clicking on the up and down arrow buttons to move menu items around. For example say we want to move Sales to be above spares.
Again, the changes reflect onto the website within a few seconds.
Modifying Description
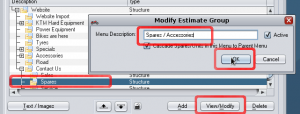
To modify description, highlight the part and click on View/Modify. Then change it to whatever you like.
e.g. change spares to 'spares/accessories'
Result on the web:
Deleting Menu Items
You can delete menu items too. Just highlight and click delete. Note that if menu item has sub menus in it or items on display (see pages on content) then you need to delete these first.
